Monday, February 28, 2011

Hi friends! Thanks for joining us for the first day of our March Blog Party!

Today's project is brought to you by Jessica, who focused on the details found in this month's amazing kit, "Homemade Happiness". The HUGE assortment of ephemera allowed her to create EIGHT layouts, SIX cards and a FFD project with beautiful details.


These kits are going fast - with only 5 kits left in the store as of this post, you don't want to miss out on your chance to get your hands on it!

With gorgeous detailing like this, it's hard to hold back those creative juices!

Now, who wants to get Lucky?

For a chance to win our GRAND PRIZE, $25 Lucky Bucks to our store, just play along. A random winner will be drawn from all Blog Party entries on/around March 4th.

Earn 1 entry for referring a friend to the LGC blog party

*** Don't forget about our Refer-a-Friend contest, where you can also win an awesome {separate} prize pack. Check out this post for more info.***

Earn 1 entry for answering today's question: Click here and find your five favorite pieces in this month's kit, then return to post your comment on this post.

Earn 10 entries for the giveaways on all of the Lucky Girl Crafts Blog Party when you place any order between now and March 3!

Introducing our March Kit.... "Homemade Happiness"

After a fantastic (and productive!) scrappy weekend, I finally got a chance to post our latest & greatest kit. "Homemade Happiness" is packed full with brand spankin' new Echo Park along with fabulous finds from American Crafts, Imaginesce, Coredinations, K&Co., Prima & more!
Join the Lucky Girls for our monthly Blog Party, March 1-3, to celebrate
and get inspired by the huge assortment of projects we've created for you!

With all of the yummy little details in this kit, it's no wonder there's already just a handful of them left in the store. Hurry and get yours now before they're gone!

Friday, February 25, 2011

February's final FFD challenge! The best things come in the smallest packages...

Hi Lucky Girls! Thanks for joining us for the final February
FRIDAY FUN DAY CHALLENGE
Where imitation is the highest form of flattery!

This is officially your last chance to enter to win our March Kit - "Homemade Happiness". It's full of brand spanky new Echo Park, American Crafts & Imaginesce.

To participate the FFD challenge, you must create your own project inspired by any of the following from the February Friday Fun Day projects:

Overall Design
Color Combination
Title of the Project
Use of Embellies

Be sure to post your project to InLinkz gallery at the end of this post no later than March 2nd!
You can post any kind of project (layout, card, altered item, home decor, etc.) that has been inspired by any of the February Friday Fun Day Challenges - either this project, Ana's memory box , Natalie's journal, or Jessica's busy box.

**********

Good morning everyone! Stacy here with your FFD challenge this week.

Today your challenge is to create a homemade gift bag. I know it's fun to decorate the plain gift bags you can grab at the store, and in some cases depending on the size of your gift that is a FABULOUS idea. This gift bag is created for the smaller gifts ( money or gift cards ).

Here is how I decorated mine:


So let me tell you how I did the front of the bag and then don't worry ladies....I'm going to give you the measurements to create this gift bag out of cardstock also :)

On the front of the bag you simply cut your background piece of paper to 3 1/2" X 3 1/2". Then create whatever you want on top of this piece. I used some of the fabulous bling on mine around the stamped image. I also wanted to cut out some of the stars from the paper since they went well with the stamp I used, and of course I couldn't resist the pop dots under EVERYTHING!!

Now for the size of the bag. I hope you can see the measurements well in the picture.


- Cut you cardstock to 11" X 8 1/2"
- Score the 11" side from one side to the other at 4 1/2" & 6 1/2"
- Next to make the folds inside score 2" from each end on each side. (this is the diagnal score line which will help your bag fold)
- Score the 8 1/2" side at 2 1/2" and 6"
- Now all you need to do is fold each score line and your bag should come alive.
- once you have it all folded up hold it together and punch 2 holes in it to tie ribbon through.

**Before you tie it shut, it's easier to place your decorated piece for the front of the bag on while it's still flat**

Thanks for stopping by and I can't wait to see some of your creations!!

~~Stacy~~


Wednesday, February 23, 2011

A Double Dose of Mid-Week Mojo!

We've got a special treat for you this week to help get you in a creative mood and ready for the weekend!
First, from Lucky Girl Ruth - an adult take on the kiddo-centric February kit:
Check out how well she layered her textures and patterns on this one!
I've also got a layout from a fresh face for you. Heather recently won the January Lucky Girl kit "Forever Love" from our sponsorship at Practical Scrappers. She created this amazing, multi-photo layout that showcases many of the fanciful kit contents:
Be sure to click on the picture to check out the fantastic detailing she's added to the Petaloo flowers! Oh, and check out her blog - she's got several other fab projects she created with "Forever Love" too. Definitely a don't miss!
Spark your creativity and head on over to the store - we have just one of the January kits and a few of the February kits left in our store - get yours soon while you still have your chance!
P.S. There are only a few more days to take advantage of our Fantastic February deal!
Get 15% off any prepaid Lucky Girl Crafts subscription - available in 3, 6 and 12 month options when you use code LOVE2SCRAP at check out.

Friday, February 18, 2011

Friday Fun Day Challenge - Keeping the kiddos busy...

TGIF! I love Fridays - not just because they signal the start of an awesome weekend, either. It's also the day for the
FRIDAY FUN DAY CHALLENGE
Where imitation is the highest form of flattery!

We're giving our crafty friends another chance to win our March Kit - "Homemade Happiness".
To participate the challenge, you must create your own project inspired by any of the following from the February Friday Fun Day projects:
Overall Design
Color Combination
Title of the Project
Use of Embellies


Be sure to post your project to InLinkz gallery at the end of this post. You can post any kind of project (layout, card, altered item, home decor, etc.) that has been inspired by any of the February Friday Fun Day Challenges - either this project, Ana's memory box or Natalie's journal.
**********

Hi friends! It's #1 Lucky Girl Jessica here, along with my sweet girl Sophia! We've got a fantastic recycled project for you today, perfect for keeping your little ones occupied while you're busy at home, work, or running errands.

For this project, you'll need a clean, clear plastic berry box (one that closes firmly), scissors, Crop-o-Dile, assortment of scrap papers, embellies, ribbon (one about 12" long, and one about 7" long), a large button and brad, glue dots, and Mod Podge (not shown). Once your project is complete, you'll fill it with small toys, playing cards, mini pens, etc.


I love my February "Kid at Heart" kit, and had some perfect papers left over for this fun project. There's still a few more of these gorgeous kits left in the store, so be sure to get yours before it's gone!!!


Using your Crop-o-dile, punch a hole in the bottom portion of the container, directly in the middle. You'll also punch holes in the two corners (bottom portion of the container again), right where the top clamshell-connects to the bottom.

Open your brad fully, then poke the prongs through the button holes.
Thread the open brad through the center hole you just punched in your container, and set the brad.


Run your larger length of ribbon through the two holes you created at the connection, forming a handle.


You'll also thread a smaller bit of ribbon through the holes on the top portion of the container. (My container had holes on the top already, but you may need to do this yourself.) This bit of ribbon needs to be large enough to slip around the button closure.

Next, using a template, trace a square for the top design on your box. My Tim Holtz Distress Ink pad fit perfectly into the design on the box - which was good because I am horrible at making my own template!


Decorate the front of the box to fit your child's beautiful, unique little person. I used the cutie-patootie animal, lined paper and flowers from the Prima awesomeness found in this month's kit, along with some flowers, rub-ons and bling from previous Lucky Girl kits.
Once that's complete, you'll Mod-Podge the tile onto the top of the box. Don't worry if your embellisments are bulky - adding the Mod Podge will help provide stability and reinforcement so your design sticks around for the long run.


Mod-Podge a second panel on the inside of the box, then fill with small toys, cards and nick-knacks that will help entertain your kiddo. You'll be surprised how much fits into a tiny little box!
The busy box is kiddo-tested & kiddo approved! Here's to great accomplishments by both parents and kiddos.
*******
Now, go get crafty! I can't wait to see what you create!!!

P.S. - Would you like some more fantastic crafty ideas? Check out the Frugal Girls - they have a weekly Chic & Crafty Link Up Party, filled with tons of amazing ideas.


Wednesday, February 16, 2011

Mid-Week Mojo - A Dreamy Canvas

It's Wednesday, and guess what that means?? Not only does it mean half of the week is over, but it means it is time for Mid-Week Mojo!! This is Emily with a project I created using the Lucky Girl Crafts February Kit, "Kid at Heart."  We saw with Natalie's project that this kit not only can be used for kids stuff, but stuff for yourself as well! 

I created an altered canvas for my bedroom for today. I absolutely LOVE the Bo Bunny papers and the Adornit paper with stars. They were calling to me. All I thought was nighttime, and a night scene with stars in the sky. Which is how this canvas came to be. 

Supplies Needed:

Blank stretched canvas
White Acrylic Gesso
Mod Podge
Glimmer Mist

This is a VERY simple project to create on your own with scraps from this awesome kit! The first step in creating this is to cover your blank canvas with two layers of White Gesso. After the gesso has dried, use your Glimmer Mist in your chosen color to spritz the canvas for your background. You then fussy cut some of the stars from out of the Adornit paper. I left some of them together in bunches as I was cutting and cut others apart. Take the darker blue side of your Bo Bunny paper and hand cut some clouds. I used a white opaque pen to trace around the clouds. Now is time for the fun part! Use Mod Podge to adhere the stars and clouds on your canvas in a night scene. After the pieces where adhered, I coated everything in a layer of Mod Podge. This also smears some of the Glimmer Mist, but I love the way it looks. I then didn't have to mist it again. I found the quote on dreamers online, printed it in a special font on white paper, misted it, and then cut it out. I adhered it with Mod Podge as well. Let it dry and you have a wonderful decoration!!! 

Here is a close up.


I hope you have gotten some inspiration from today's Mid-Week Mojo and if you create something with one of the Lucky Girl Crafts kits that you would like to share with us, link it up in the comments!!! We love to see what our kit lovers create! 

Bo Bunny Block Party 
Adornit Plaid Chunky Stars


Other Products Used
Tattered Angels Glimmer Mist - Graphite

Blank Stretched Canvas

Acrylic White Gesso

Matte Mod Podge

We are also having a refer a friend contest!!! 

Here are the deets:

Lucky Girl Refer a Friend Contest

In an effort to grow LGC, I'll be giving away an awesome prize package filled with papers, stickers, rub-ons & embellies to the Lucky Girl who refers the most business to our fabby crafty store. The prize pack will be filled with products from your favorite manufacturers, such as American Crafts, Bazzil, Imaginisce, Prima Marketing, Petalloo, Pink Paislee, Tim Holtz & more!

Here's how you can win!
Earn 1 point for each person who purchases any "extras" (the flowers, alphas, stickers & embellies that are left over from our monthly kits)

Earn 2 points for each person who purchases an individual kit.

Earn 3 points for each person who purchases a 3-month prepaid subscription.

Earn 6 points for each person who purchases a 6-month prepaid subscription.

Earn 12 points for each person who purchases a 1-year subscription (billed monthly)

Earn 15 points for each person who purchases a 1-year PREPAID subscription.

Be sure to have your friend post your name in the note box at check out.
The more referrals, the bigger the prize! This contest will run through March 15. Good Luck!


Friday, February 11, 2011

February Friday Fun Day Project #2-- Go Go Go!

It's Friday and you know what that means. It's time once again for our


Friday Fun Day Challenge
where imitation is the highest form of flattery!

Get crafty this weekend and enter your project no later than Wednesday, March 2nd for a chance to win our February prize! To participate the challenge, you must create your own project inspired by any of the following based on Natalie's project:

Overall Design
Color Combination
Title of the Project
Use of Embellies

~ ~ ~


Hi everyone, it's Natalie here again-- are you as excited as I am that it is Friday??!


I'm here today to share my Friday Fun Day project with you... a journal to take with me to the gym! Now, I know that many of us made New Year's Resolutions (or other resolutions) to maintain or get into better shape this year. I know that part of the way that I motivate myself to get into shape is to see the progress I've made. When I go to the gym, I like to record my times for running on the treadmill or elliptical, and weights and reps when I do strength training. Until now, I didn't really have a good place to keep these notes.

Enter the exercise journal.

The idea of an exercise journal is nothing new, but I thought it would be fun to alter an inexpensive journal for carrying to the gym.

I found this 5"x7" journal at Target for about $1.50! I liked that it had really sturdy chipboard covers-- both back and front, and heavy-duty double-spiral binding. Perfect for enduring the wear-and-tear it might face in my gym bag.


So... it's not so shabby looking on its own, but I wanted something even cuter! So I went straight to my Lucky Girls February 2011 kit and pulled out some of the papers and embellishments.


I think that the Echo Park "Set the Table" paper is my very favorite in the whole kit... and the colorful little numbers on the front were perfect for an exercise journal! I cut out two rectangles that were just enough smaller to leave about an 1/8" border when placed on the journal covers.


Since this journal is going to be carried to, from, and around the gym, I wanted the embellishments to be fairly minimal and more importantly, pretty flat! So I layered some small pieces of the patterned papers under my Thickers and attached those fantastic flowers with some brads that I had on hand. For some final detail, I added some faux stitching with a thin black pen.


I attached everything with super-strong Glossy Accents (and made sure that there was a little dollop especially behind the brad flower centers).


Now I have a cute (and motivating!) journal to take with me to the gym!

I'm looking forward to seeing what you create inspired by our February Friday Fun Days!

~natalie


Lucky Girls February kit supplies:
patterned paper: Echo Park Life is Good (Set the Table, both sides), Imaginesce Enchanted Princess (Posies, B-side)
alphas: American Crafts Thickers (Giggles foam)
Prima Marketing Little Guy flowers

other supplies:
spiral bound notebook

brads: the Paper Studio

black pen: Sharpie

Glossy Accents


Thursday, February 10, 2011

Introducing our new Refer-a-Friend Contest!

Lucky Girl Refer a Friend Contest

In an effort to grow LGC, I'll be giving away an awesome prize package filled with papers, stickers, rub-ons & embellies to the Lucky Girl who refers the most business to our fabby crafty store. The prize pack will be filled with products from your favorite manufacturers, such as American Crafts, Bazzil, Imaginisce, Prima Marketing, Petalloo, Pink Paislee, Tim Holtz & more!

Here's how you can win!

Earn 1 point for each person who purchases any "extras" (the flowers, alphas, stickers & embellies that are left over from our monthly kits)

Earn 2 points for each person who purchases an individual kit.
Earn 3 points for each person who purchases a 3-month prepaid subscription.

Earn 6 points for each person who purchases a 6-month prepaid subscription.

Earn 12 points for each person who purchases a 1-year subscription (billed monthly)

Earn 15 points for each person who purchases a 1-year PREPAID subscription.

Be sure to have your friend post your name in the note box at check out.

The more referrals, the bigger the prize! This contest will run through March 15. Good Luck!

Wednesday, February 9, 2011

Mid-week Mojo -- Queen of the Craft Room

Happy Wednesday, everyone! I'm here this week to bring you a little mid-week mojo. Each week, we'll stop in to show you a project to inspire you and get you thinking about how you can use these fantastic Lucky Girl kits!

This month, we're celebrating playtime with the Kid at Heart kit... And one kind of playtime I know we all have in common is crafting :)

I don't know about you, but the one place I reign supreme in my house is my craft room...

So I thought, "Why not make a little sign to commemorate this fact?" ;-)

I used the wet-paper-ruffle technique to make the banner at the bottom.

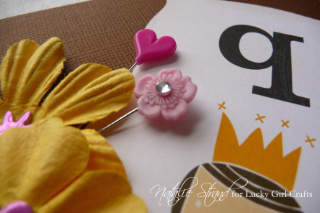
This little sign was the perfect way to show off those super-cute alphabet cards in the kit. How much fun are they?! And the Valentine's pins were the perfect finishing touch to the flowers!

I hope this little sign inspires you to make a fun little decor item from your February kit... Spice up your "play space"! I can't wait to see what you create!

~natalie


Lucky Girl February kit supplies:
cardstock: Bazzill Canvas (Hershey, Petalsoft)
K&Co. Alphabet Card
Prima Marketing Little Guy flowers
K&Co. Kelly Panacci Valentines Pins
K&Co. Studio 112 Adhesive Gems - Pink Metallic

other supplies:
Colorbok chipboard album page
white acrylic paint
pink ribbon
white pen: Uniball Signo
brown pen: American Crafts Slickwriter

Monday, February 7, 2011

Starting the week with savings (and a winner)!

Thanks to all of you who joined us for the February Blog Party! I hope you enjoyed it and got lots of great crafty ideas.
There are still just a few more of our "Kid at Heart" (and actually, 1 or 2 of our "Forever Love") kits still available - head over to our store and check them out!
Lucky Girl Crafts makes an excellent Valentine's Day gift,
you can SAVE 25% on orders of $30+ through 2/12/11
using discount code "SUPERSUNDAY
Now, who wants to know who our grand prize winner is?!
None other than JOCELYN!!!
Hooray - please e-mail me at jasafras98@yahoo.com to claim your prize by February 15th.

Friday, February 4, 2011

February Friday Fun Day Project #1 - Mommy's Play Time

It's Friday and you know what that means. It's time once again for our

Friday Fun Day Challenge
where imitation is the highest form of flattery!

Get crafty this weekend and enter your project no later than Wednesday, March 2nd for a chance to win our February prize! To participate the challenge, you must create your own project inspired by any of the following based on Ana's project:


Overall Design

Color Combination

Title of the Project

Use of Embellies

***
Are you a Lucky Girl?! Play along with us month using the inspiration you gain from any of the February Friday Fun Day projects. One lucky winner will receive a March kit or $25 store credit.
*International winners must pay for their own shipping.*
Just link your project to our inLinkz at the bottom of this post to be entered into our drawing. We look forward to seeing your projects!


Without further ado, here's Ana's tutorial & beautiful project, perfect for Mommy's Play Time (aka - srapbooking, of course!)

One of my New Year’s Resolutions was to complete more altered objects. So I decided to try my hand at making an altered box. I am using a child’s size shoe box,


The next thing that I do, is to paint the entire thing white. I always do this, not really sure why, but I do. So feel free to skip this step if you like.


Next pick the papers you want to use. I am using Bo Bunny Olivia line. To measure each part, I just laid the box on top of the paper and made little marks larger then the actual side. Then I cut each piece that I needed.


Once you have everything cut, pick which side you want to start with and using Mod Podge start pasting the sides down. Like I said, I always make them so that they will hang over the side.


Then using my new favorite tool, the Martha Stewart craft knife, I cut the sides down but not all the way. I leave enough hanging over so that I can then sand them down. Once they are sanded I then inked the sides with distress ink.
I decided to use lighter colored papers on the top and I distressed and inked those also. Then I added a little flower and a title. Once the project is complete, add one last coat of Mod Podge to seal the box.
Here is my final project:


Our first Friday Fun Day winnner is...

Leslie!

She created this darling layout inspired by the colors of the Love Notes mini mail box:


Congrats! Please e-mail your shipping address to jasafras98@yahoo.com by next Friday, February 12 to claim your prize.
Thanks to you all for playing along!

Tuesday, February 1, 2011

C'mon & Celebrate! February "Kid at Heart" Blog Party

Thanks for joining us for the Lucky Girl Crafts blog party!
This month we're celebrating this amazing kit:


Join us each day of the blog party (February 1, 2 & 3) to take a peek at the projects the Lucky Girl DT has created with this month's kit Please scroll down to the post below to see my latest creation! We'll also be giving away prizes to a few LUCKY GIRLS - are you one of them? Read on to find out how you can win!

Want a Lucky Girl kit of your own? Check out February's fantastic special:
Get 15% off any prepaid Lucky Girl Crafts subscription - available in 3, 6 and 12 month options when you use code LOVE2SCRAP at check out.
For international orders, please contact me by e-mailing your order to jasafras98@yahoo.com

Here's how you can win $7 lucky bucks to the store:

Earn 1 entry for referring a friend to the LGC blog party
Earn 1 entry for answering today's question (on my project post, below)
Earn 10 entries for the giveaways on all of the Lucky Girl Crafts Blog Party when you place any order between now and February 3!

Be sure to visit all of the Lucky Girls to check out all of the amazing projects created with the Kid at Heart kit and to have an ever greater chance of winning.

Kid at Heart / Home Decor

Happy Thursday, my friends! I'm so glad you're joining us for the last day of our February Blog Party, celebrating our Kid at Heart kit! Please be sure to check out the details on our Blog Party (above), and visit all of our Lucky Girls, especially our newbies, to check out the amazing projects they've created with the kit. Be sure to comment on each site for a chance to win!

Emily is bringing our last project for the party, with this fantastic wall hanging:

Her handmade flowers are a perfect compliment to the bunch of Prima posies in the opposite corner.

Which one of you is going to be a winner?

Each of the Lucky Girls on our blog party has some Lucky Bucks to give away, and each day of the party you've have another chance to enter to win!
The grand prize of the party can be found right here!!!
Enter here for $25 Lucky Bucks to our store - check out the ways you can win:

Earn 1 entry for referring a friend to the LGC blog party

Earn 1 entry for answering today's question:
What was your favorite project from the Lucky Girl Blog Party?

Earn 10 entries for the giveaways on all of the Lucky Girl Crafts Blog Party when you place any order between now and February 3!
 

Graphic Design by Polka Dot Dandy